This article explains how to set up the Out of Office functionality for the “Time for Dynamics 365 Business Central” extension app.
Out of Office can be used if you are using Microsoft Exchange Online (Office 365 Email).
The Out of Office function will do the following:
- Connect to Microsoft Exchange Online
- Loop through the list of each user calendar to:
- Generate a list of all scheduled appointments and/or meetings over the next 30 days, which are designated as Out of Office or Working Elsewhere
- Clear and Fill a data table in Business Central to make the data available for display within Business Central.
Setup
Azure Portal
Perform the following in the Azure Portal.
- Create new App Registration named “BC Time Out of Office” or something similar.
- For Supported account types, leave the default of Accounts in this organizational directory only
- Leave the Redirect URL blank and click Register
On the left navigation panel:
- Click on Certificats & secrets
- Click the tab named Client Secrets
- Create a new Client secret with a description of “Access” or something similar.
- Set the Expires value to 730 Days (24 Months) and click the Add button
- Client secret Value cannot be viewed, except for immediately after creation. Be sure to save the secret when created before leaving the page. You will need this later.
I recommend starting a notepad app and copy/paste the Secret ID and Value.- * Save this secret Value somewhere safe, or destroy it after you are done configuring. This value is the password which gives access to read your O365 data as defined below.
On the left navigation panel:
- Click API Permissions
- Click Add a permission
- You will notice there is a User.Read – Delegated permission already there. Do not modify this.
- In the default tab named Microsoft APIs, Click the large Microsoft Graph button.
- Click Application Permissions
- *** If you choose Delegated Permissions you will get an error when trying to run the job queue entry.
- Scroll down and expand the Calendars group.
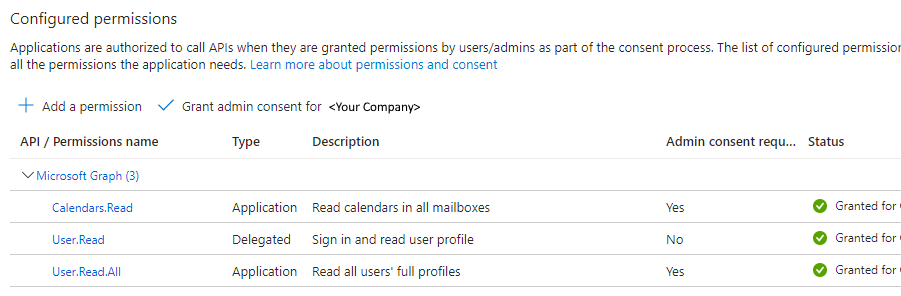
- Check the box to grant permissions to Calendars.Read
- Scroll down and expand the User group.
- Check the box to grant permissions to Users.Read.All
- Click the Add permission button
- Click Add a permission
Click the Grant admin consent for <your company> button, and confirm yes.
Your permissions should look similar to the image below.
On the left navigation panel:
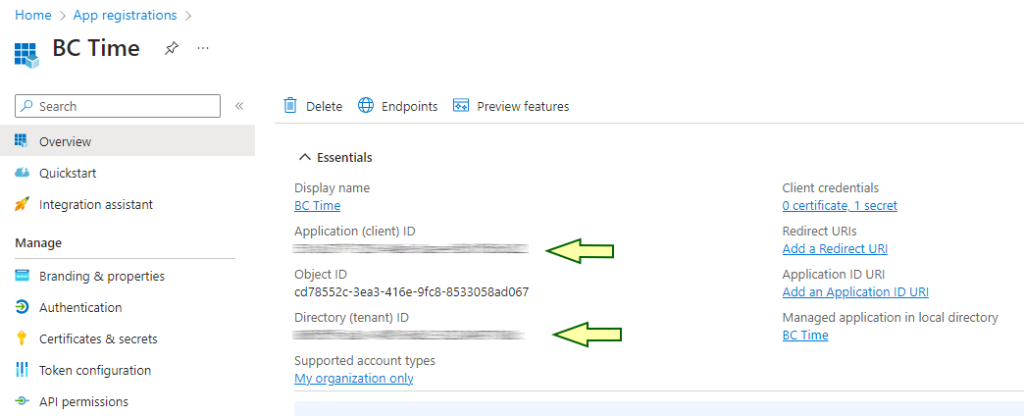
- Click Overview
- Document collect the Tenant ID and the Application ID. These two along with the Secret from above are needed to configure BC for Out of Office.
Business Central BC Time Settings
With the settings noted from the App Registration above, paste the values into the appropriate field on the Time – Configuration page in BC.

Scheduled Refresh
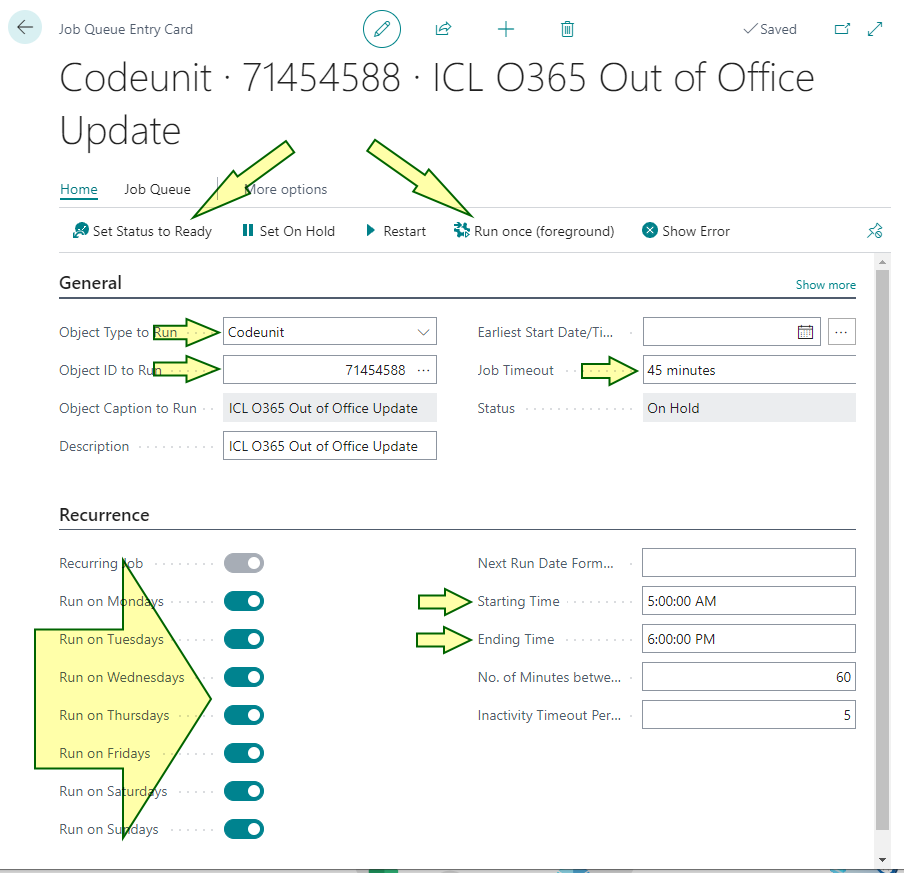
A Job Queue Entry can be created to refresh the Out of Office calendar list.
As a reminder don’t forget to click the “Set Status to Ready” menu item when configuration is complete. You may also run the job queue entry to test if it is working properly. To view the Out of Office list, you can search for and display the page named Out of Office.
An example job could look as follows: This job updates the list every hour between 5:00 AM before people start for the day and 6:00 PM after people leave for the day.