If you have not set permissions for the Item Import Tool, please see the article Installing the Item Import Tool.
There are two ways you can use the Item Import Tool:
- With a blank item number, you specify a description (and optionally any other fields you wish to set) and the item template you wish to apply. The item template will fill in any of the values you did not specify.
- You specify an item number and set the other fields you want set within the spreadsheet, and only apply a template optionally.
Configuring the Item Import Tool consists of preparing spreadsheets that users can download as a blank template with headers, where they can download and fill out the data for import.
| Important Note: You must include the following two fields in the spreadsheet, spelled exactly as shown in the example, even if they are not filled in with data: 1. No. 2. ICL Import Item Template Code |
Sample Item Import Template Spreadsheet

Download Sample File
| Tip: On the Item Card Page, you can press Ctrl+Alt+F1 (if you have ‘Execute’ permissions on the Item table) to load the page inspector and get a list of all available fields even if they are from another extension, or you can open the Personalize field list to see most of the available fields that come with Business Central. An admin with the SUPER permission set or your Microsoft Partner can help get a list of available fields if you do not have permission to list them. |
Uploading Templates (for others to download and use)
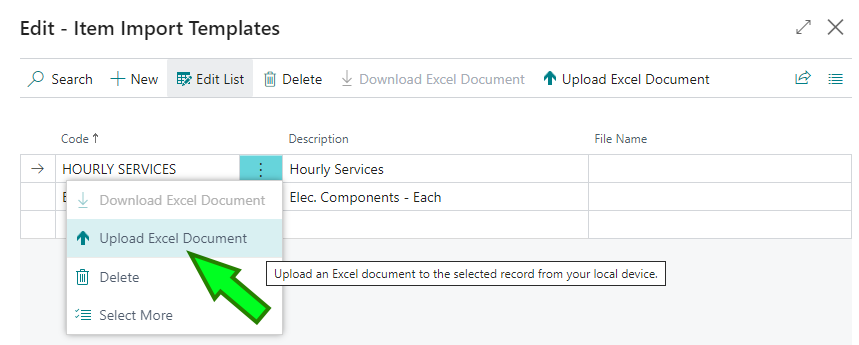
From the Item Import Tool page, click the ‘Item Import Templates’ menu action to open the page for managing templates; named ‘Item Import Templates’

Create a new Item Import Template record by specifying a Code as the unique identifier, and a description for users to understand what or who the template is intended for. From the menu, click ‘Upload Excel Document’ and select an Excel Document to upload from your device.

Once the Excel spreadsheet is uploaded, it will be available for others to download, fill out, and use for item creation.

